Joyzz
Joyzz
By now your Easter baskets are full (well, maybe) and you have a menu put together for your Easter meal (possibly), but just in case you’re still in planning mode for tomorrow here are a few excellent last-minute Easter ideas.
#1. DIY Ombre Tablecloth

Lauren Elise Crafted
What you’ll need:
1. White Tablecloth
2. Spray Bottle
3. Water/Fabric Dye
Hang your tablecloth from a clothesline and start spraying! More on the corners and less as you make your way to the middle. Let dry and voila! This would be beautiful with a purple or pink dye for Easter.
#2. Fresh Fruit Beverage

My Recipe
There’s nothing like fresh flowers and fruits to bring the feeling of Spring and Easter onto your table. Consider making a Sangria or a non-alcoholic punch and serving it with sliced fresh fruit. Here’s a great recipe to get you started!
White Sangria
Ingredients:
#3. Calligraphed Eggs

Oh Happy Day
Add a splash of sophistication to your eggs with these adorable templates from Oh Happy Day. If your crafty enough, do your own calligraphy and use these as place settings!
#4. Easter Candy Centerpiece

Under the Table and Dreaming
Do something useful with the beautifully colored jelly beans and bright yellow peeps this season and create a unique Easter centerpiece to display on your table.
#5. Remember What It’s all About

Amazon
When Easter dinner is cleared and dessert is plated throw in The Passion and keep the day in perspective. End your Easter holiday being thankful for the sacrifice made for you and celebrated on this day!

Shelterness

Better Home & Gardens

DesignSponge

Shelterness

Elements of Style

Elements of Style

Belle Maison

Better Homes and Gardens

Sweet Home

Elements of Style

Elements of Style

Shelterness

Lucas Studio

Better Homes and Gardens

Shelterness

Source Unknown

Little Bit Funky
Dip painting is one of my favorite trends this season and right now it’s everywhere; and I can’t get enough of it! From kitchen utensils to dressers and chairs this easy and trendy style of painting is a quick way to update to so many things around the house.
I have two beside tables that will be getting this treatment over the weekend! What you do have lying around the house that could use some sprucing up? Here’s some inspiration to get you motivated to give this trend a try…

The Sweet Beast

Atkinson Drive

Honeybear Lane

Source Unknown

Chic Cheap Nursery

Tuinieren.nl

Poppytalk

The Fancy

Simple Song

Kirtsy

We Heart It
Spring is officially here and Easter is on the way! I’ve always filled the house with Spring decor but have never really been inspired enough to decorate for the Easter holiday itself. This year, though, I’m going to give it a shot! There are just too many cute ideas to pass up, from wreaths to baking to egg decorating…if you’re crafty or a DIY’r the Easter possibilities are endless. Here are 5 projects that have inspired me to get my house Easter ready this season. I would love to hear from you as well…do you have a favorite Easter project or a new one you’re anxious to try out this year?
#1. Easter Tree

The Creative Mint

The Creative Mint
Eggshells painted with a Spring floral pattern are secured to a cherry blossom branch with string to make this beautiful display. The eggs were hollowed out as opposed to hard boiled. Maybe you guys know how to do that but I’ve never tried it before…here are the step by step instructions courtesy of eHow:
http://www.ehow.com/how_15776_hollow-egg.html
#2. Tea Cup Floral Displays

Emporio 74

Emporio 74

Emporio 74
This display is as much for Spring as it is for Easter and I love it! If it’s not practical for you to keep your table set all the time (for me it’s not) try putting together the place setting and displaying them on a bar or coffee table.
#3. Coconut Nest Cupcakes

Martha Stewart
If you have a cake stand with a glass cover these can be displayed before they’re eaten. The recipe yields 40 so maybe you can feed your family half and insist they wait a few days before eating the rest : )

glo

glo

glo
So very fashionable, right…ombre is everywhere so why not on your Easter eggs! Glo has a great full tutorial on how to get this look right…follow one of the picture links above.
#5. Colorful Deviled Eggs

Recipe by Photo
I want to make these for our next get together or even on a Sunday afternoon for the family to snack on. They’re almost too pretty to eat – take them to a church function or Spring baby shower. They are officially now a must for Easter dinner.

Better Homes & Gardens
I did some earlier posts on colors that are popular for the Spring 2013 season but one color (or lack there of) that never goes out of style is white. It’s clean and crisp and provides the perfect back drop to let all of your other color loves pop!
It may not be practical to turn your whole home into a visual display of lily white but there are a few key pieces that can help you achieve the look on a smaller scale.
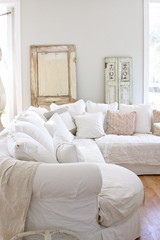
#1. White Slipcovers
This is a scary piece to incorporate if you have kids, or pets, or wear shoes or like to sit but opting for fabrics that are more forgiving, like white denim as opposed to white linen, can help make this a reasonable choice for your home and family.
#2. White Dining Table

Desire to Inspire
If you’re a DIY’r this is a project you may have already considered more than once, right? I have! Painting your table white or bringing a white table into your dining space gives you endless decorating and redecorating possibilities. From changing out the table linens to adding a fresh vase of flowers…there’s not much you can’t do with a white table this Spring.
#3. White Accent Lamps

Inspiration for Home
Another easy to do DIY project. Start with a white or clear base and a white lamp shade. Add white ruffle lace or any other white embellishment to give your white accent lamps a custom look for Spring.
#4. White Coffee Table

A Beach Cottage
I am unintentionally promoting my love of DIY in this post but really…a repurposed door, a pallet, a new white coat of paint on a thrift shop find. Freshen up your living space and get creative at the same time this Spring! Besides, a white coffee table looks even better after you’ve stained it up with coffee rings and scuff marks.
#5. White Drapes

Centsational Girl
Framing your windows with white drapes can make the whole room look larger; that and they filter in the Spring sunlight in such a pretty way! No matter what colors you having going on now, adding white drapes will instantly make your room feel fresher and ready to welcome in the warmer weather.
#6. White Flowers

Jenny Steffens Hobick
Put them everywhere! Arrangements around the house lighten the mood and help bring the outdoors inside…there’s nothing that says Spring like flowers! My favorite…white tulips. If you haven’t had enough of DIY in this post…try making the flowers yourself!

House of Smiths
Follow the picture link above for the complete tutorial.
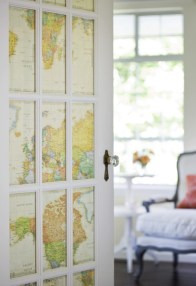
#7. White Accents

One Kings Lane

Home Made Simple

A Stylish Design

The Homesteading Cottage
If you’re not ready to commit to painting or changing out your drapes try picking up smaller accent pieces to spread out around your house to welcome Spring into your home!
Here is a list of some of the best DIY ideas I’ve come across in the last few weeks. I’d love to work on one and post the results…tell me which one is your favorite!
#1. DIY Cubes

Ana White
#2. Chrysanthemum Spoon Mirror

Addicted 2 Decorating
#3. DIY Lamp Shades

Teeny Blessings
#4. Fireplace Screen Headboard

BHG
#5. Double-Stacked Coffee Tables

Somerset Bay
#6. DIY Canvas Wall Art

Inspiration for Moms

Inspiration for Moms
#7. Mason Jar Lamps

Joyzz
#8. Repurposed Picture Frame

Becky’s Blog
#9. Revived Bedside Table

Spoonflower
#10. DIY Shabby Chic Candelabra

Sissie’s Chic Cottage

Reclaiming Your Castle
In the previous post on the Crate&Barrel inspired candlesticks I mentioned that I picked up a pack of cupcake papers…and here’s why! I’ve been seeing these wreaths all over Pinterest and decided it was about time to give it a try.
Here’s what you’ll need:
1 – 12′ foam wreath
1- pack of push pins
1- pack of cupcake papers (100 count)
1- (optional) monogram letter
1- (optional) bushel of artificial Spring flowers
1- ribbon or wire for hanging

Reclaiming Your Castle
(my original plan was to add flowers to the wreath which I still think would be a great idea; in this case the push pins were not long enough to attach the flowers securely. If you decide to add flowers, get sturdy pins!)
#1. Flip Your Cupcake Papers Inside Out

Reclaiming Your Castle
#2. Attach A Single Layer of Cupcake Papers to the Front of the Wreath

Reclaiming Your Castle
#3. Attach a Single Layer to the Top and Inside Area of the Wreath
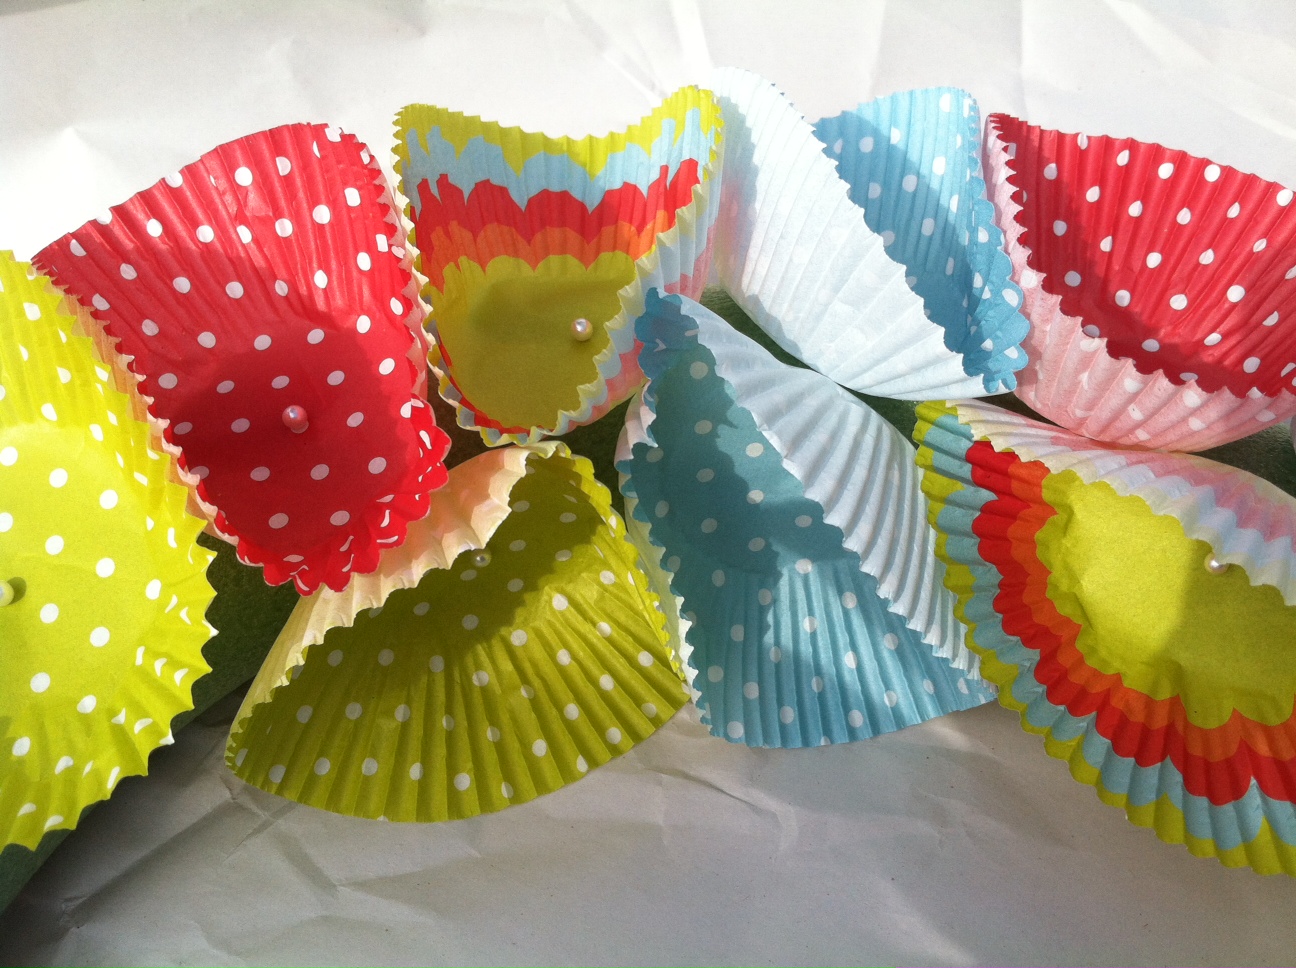
Reclaiming Your Castle
#4. When all Layers Are Complete, Fold Individual Cupcake Papers in Half and Secure to the Wreath to Fill Any Gaps

Reclaiming Your Castle
#5. Use Several Pins to Secure Monogrammed Letter to the Underside of Wreath
(Michael’s sells these for $1.99)

Reclaiming Your Castle

Reclaiming Your Castle
I hope everyone is having a good weekend! I attempted to blog a bit last night but I fell asleep with the computer on my lap; it’s been a long week!
So feeling much more rested this morning I headed over to Crate&Barrel for a little inspiration and as always, it didn’t disappoint…see how happy I look! : )

Reclaiming Your Castle
One of the things I loved the most was all the blue in Crate&Barrel’s Spring collection. From patio furniture to cookware it was everywhere and although I would have loved to buy it all, I left with $6 worth of Spring cupcake wrappers and decided to try and recreate the look on my own.

Reclaiming Your Castle

Crate&Barrel
I had a set of cheap candlesticks that I picked up from a thrift shop for $2.99 a piece. They’re a sturdy metal and have, as I’ve heard it referred to on many a design show, “good bones.” They seemed like the perfect thing to bring all that pretty blue into my house!

Reclaiming Your Castle
I would add in the step by step here but all that it really involved was picking up a spray paint suitable for metal in a color inspired by my trip to Crate&Barrel. That’s what I did and here’s what I ended up with!
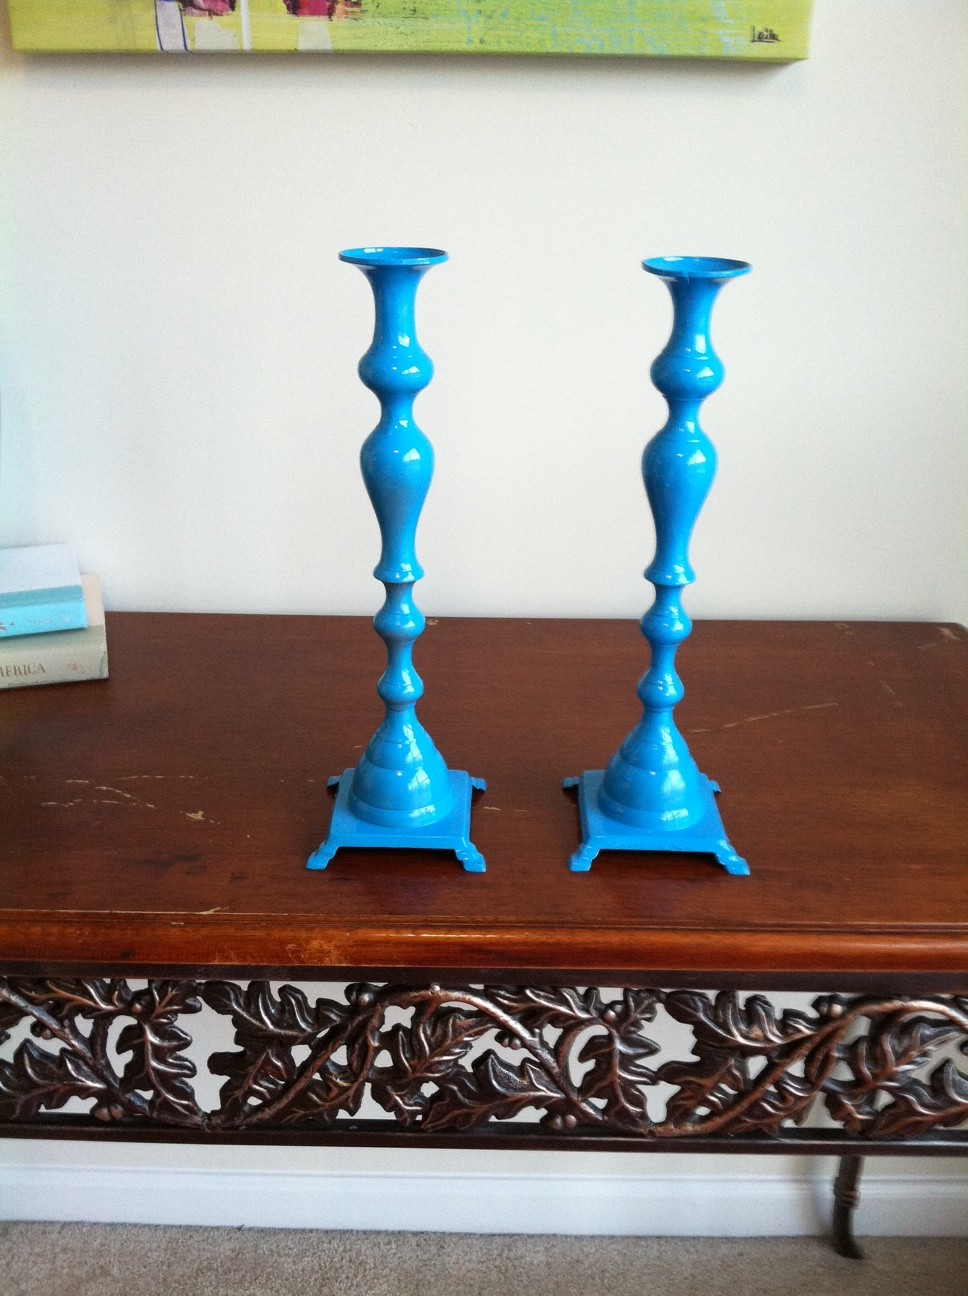
Reclaiming Your Castle
It’s amazing what a little paint can do, right?
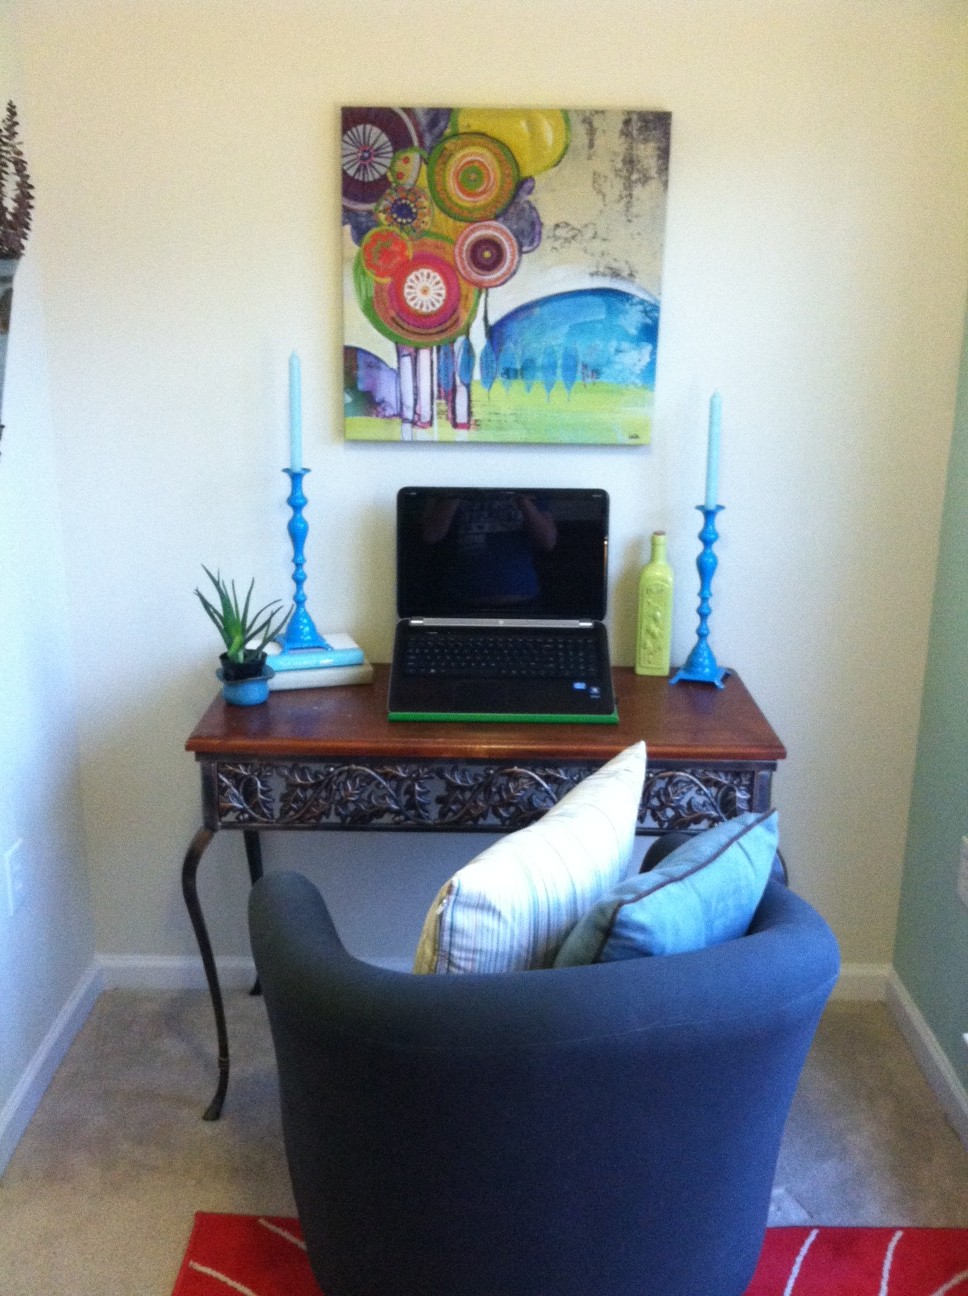
Reclaiming Your Castle
Using spray paint is a really cheap way to bring new life to old pieces. Get a little color inspiration; find out what’s trendy and if the color fits your personal taste use it to update a few things around your house!

Reclaiming Your Castle
This was a busy weekend! Saturday I had a bridal shower in the afternoon and my friend’s birthday party in the evening but Sunday was DIY day! I posted the buffet style serving dishes yesterday that I turned into a Spring centerpiece for our table, but I also decided to try out some chalkboard paint and repurpose a frame I picked up at Goodwill.
I neglected to take a picture of the original frame but once I had it pulled apart I started painting.

Reclaiming Your Castle
I used Krylon for both the frame and the chalkboard; firstly because they were on sale and secondly only Krylon had the exact color of obnoxious pink that my daughter was insisting on. Start by cleaning the glass with alcohol. Allow to dry and spray on one coat of the chalk board paint. Let that dry for about 15 minutes and spray on a second coat. I stopped here at 2 coats but I think spraying on a third would be even better. Remember that there’s glass underneath so the sharp edge of a piece of chalk could scrape the paint off.
Reclaiming Your Castle
I thought spray painting the frame would be the easy part but I was wrong…for one reason. If the frame is finished with a wood gloss remember to go over it lightly with sand paper to prime the surface for paint. I used like 5 coats but finally we got here.
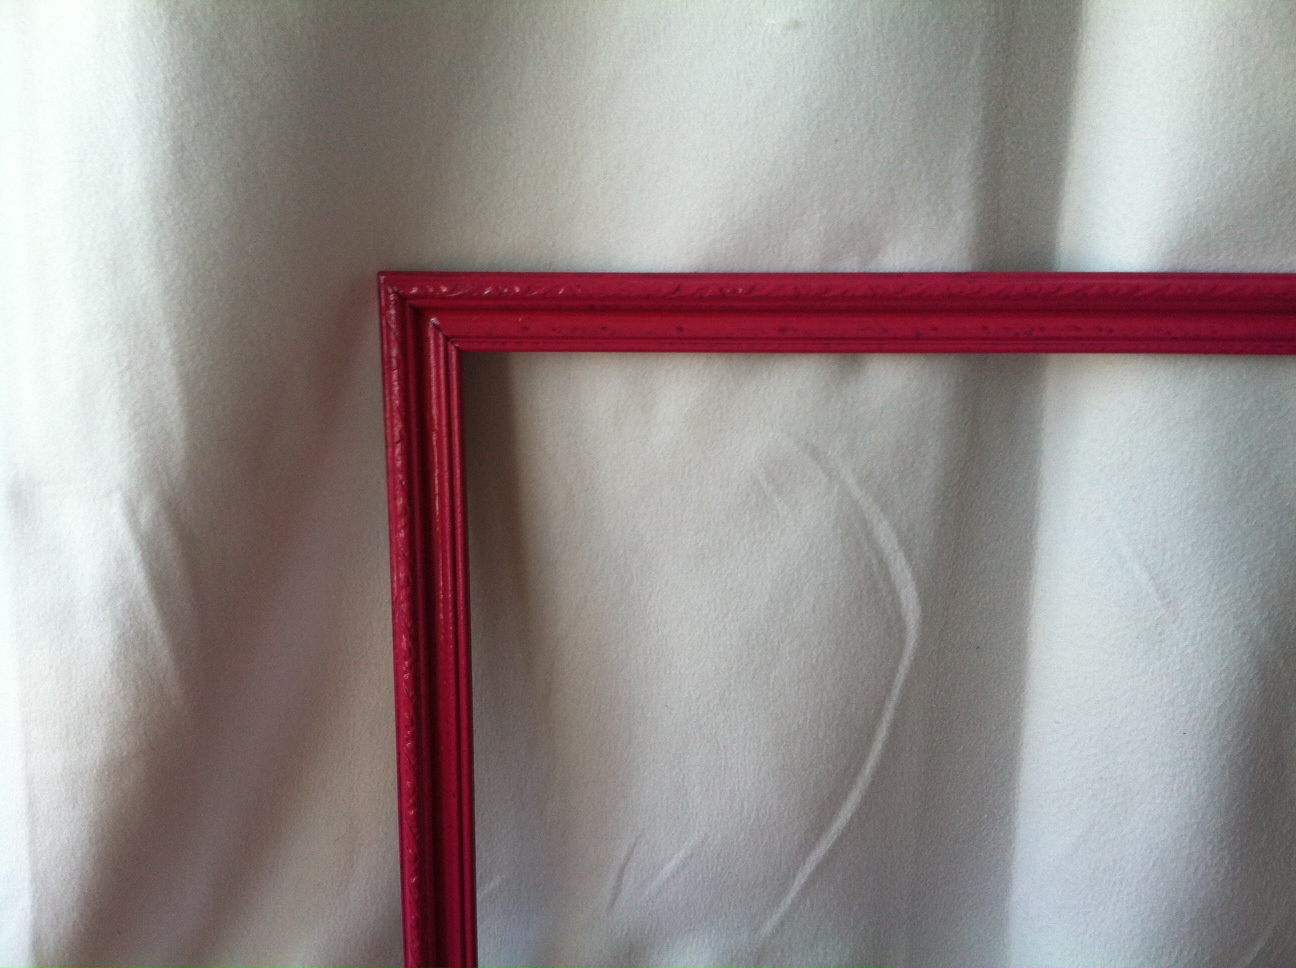
Reclaiming Your Castle
Allow the frame to dry and insert the painted glass back into the frame. Technically you are supposed to allow the chalkboard paint to set for 24 hours but the waiting was unbearable!!!
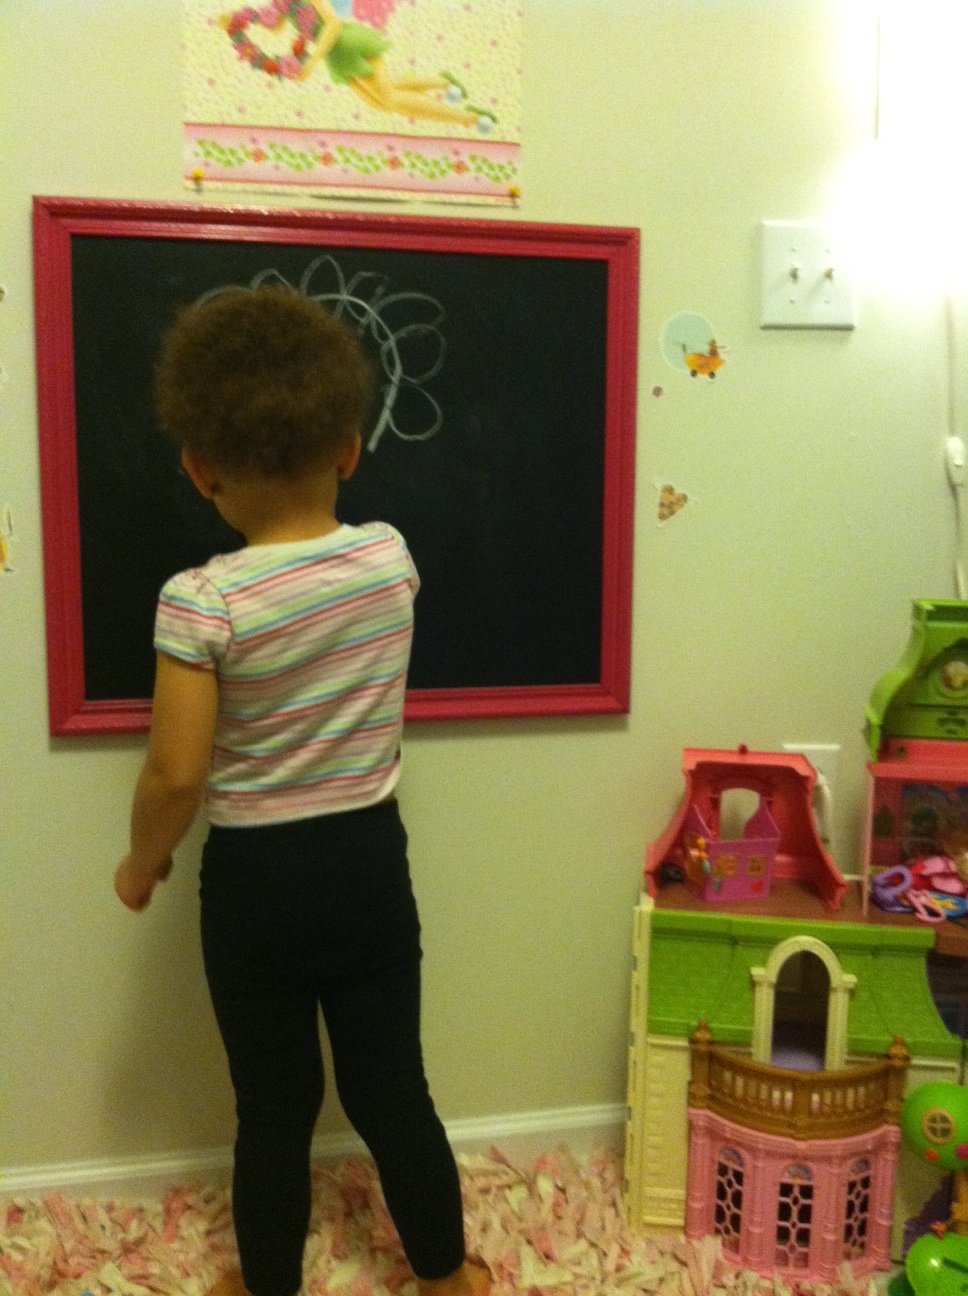
Reclaiming Your Castle
I will definitely need that third coat of paint…but I suppose it can wait until next weekend : )
fashion | design | food | events
...LOVING THE PLACE YOU COME HOME TO.
...LOVING THE PLACE YOU COME HOME TO.
Home Decorating & DIY Tutorials